Amazon Redshift
Amazon Redshift is a managed scalable database warehouse where Nobl9 users can store their metrics information. Nobl9 allows retrieving metrics data from Redshift, enabling customers to use standard SQL statements that require two specific return values—a value and a timestamp.
Authentication
Authentication - scope of support
- Nobl9 does not support SQL connections.
- Nobl9 does not support temporary credentials.
- Nobl9 supports authentication via AWS Secrets Manager stored secret for authenticating with the Data API.
- Use Cross-Account IAM roles to authenticate to Redshift (see below for the deprecated authentication method)
Secret-ARN
Nobl9 supports
authenticating with Amazon Redshift’s Data API using the AWS Secrets Manager.
To connect to Redshift through direct and agent configuration,
you must create a secret and ensure the secret is tagged with the RedshiftDataFullAccess permission.
When running the agent, you will also be asked to provide the ARN for the secret.
For more information on Redshift secrets, refer to Using the Amazon Redshift Data API | Amazon Redshift documentation.
Cross-account IAM roles
Prerequisites
You can activate cross-account access in AWS using the External ID and Nobl9 AWS Account ID. To create an IAM role ARN with cross-account access, make sure the following prerequisites are complete:
- Copy the External ID and Nobl9 AWS Account ID values in the Data source wizard.
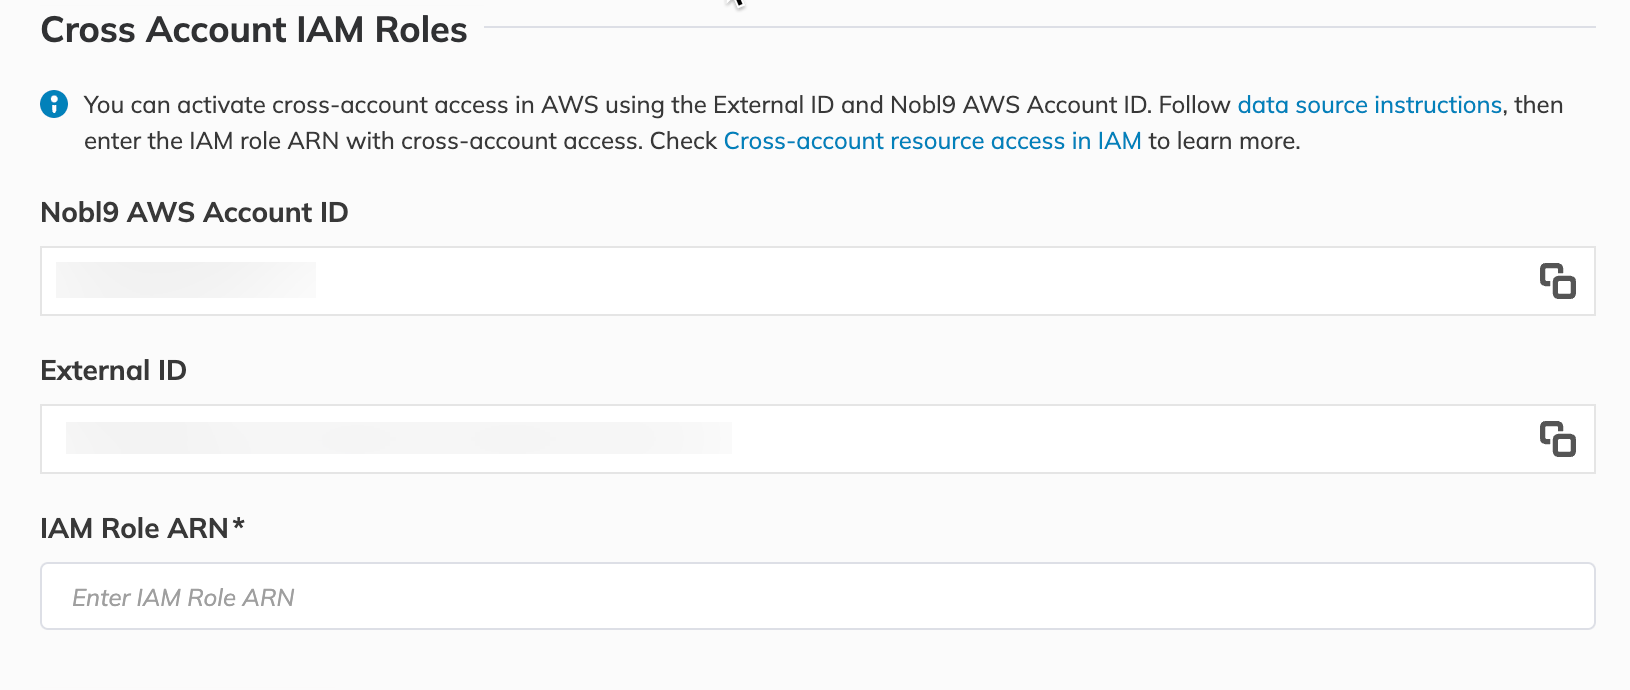
Check Cross Account Resource Access in IAM | AWS documentation to learn more.
-
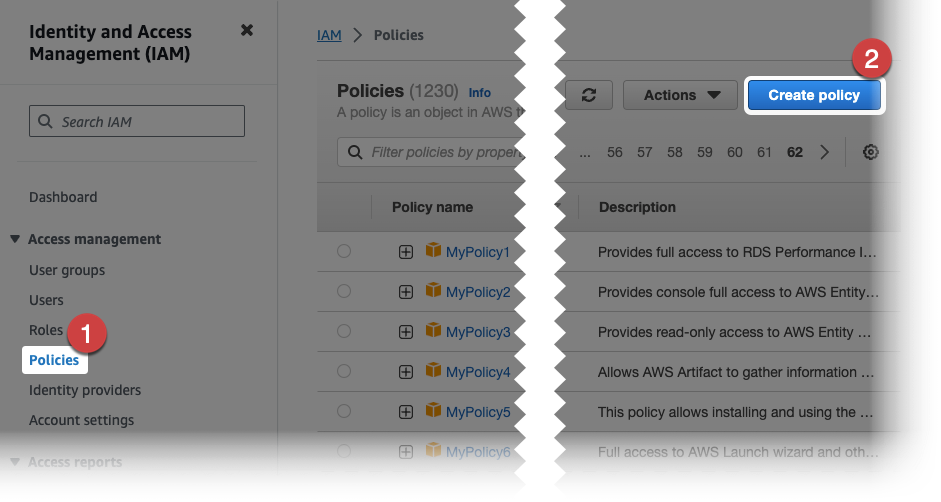
Policy permissions for your IAM role require a custom policy that allows action
secretsmanager:GetSecretValueonfor the resource pointed by the SecretARN.When you miss this policy, create it in the IAM > Policies > Create Policy > Specify Permission > JSON section:
In the policy editor, apply the following JSON statement, replacing your-Secret-ARN with your AWS Secret ARN value in the statement.resource field.
{
  "Version": "2012-10-17",
  "Statement": [
    {
      "Sid": "VisualEditor0",
      "Effect": "Allow",
      "Action": "secretsmanager:GetSecretValue",
      "Resource": "arn:aws:secretsmanager:*:your-Secret-ARN"
    }
  ]
}
IAM role ARN creation
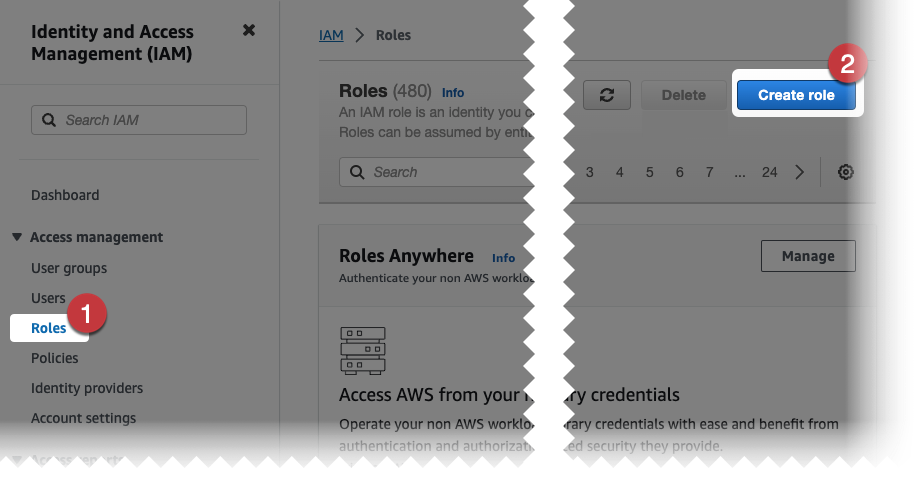
Sign in to the AWS Management Console. Open the IAM console.
- Choose Roles on the navigation pane.
The Roles section opens.
-
Click Create Role:
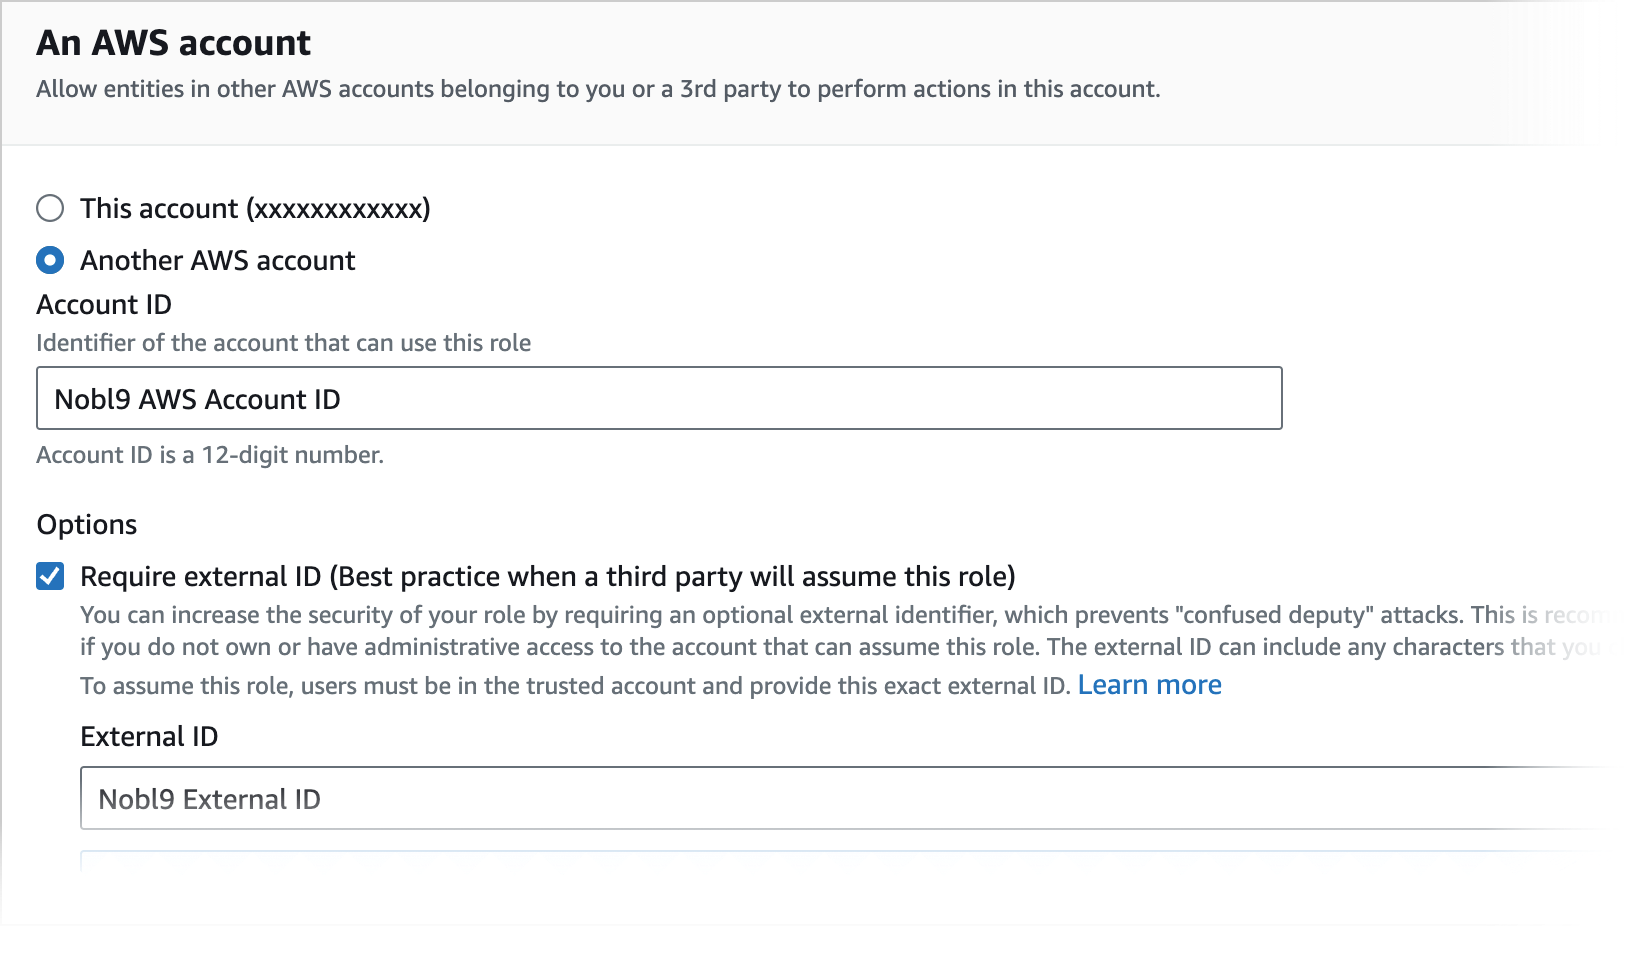
To create the access role, you select a trusted entity first.
- Choose the AWS account role tile:

-
Choose Another AWS account. Paste the
Nobl9 Account IDyou copied in the Nobl9 Data source wizard.
This is the account you're granting access to your resources. -
Select Require External ID. Paste the
Nobl9 External IDyou copied in the Nobl9 Data source wizard.
This option automatically adds a condition to the trust policy, allowing users to assume the role only if the request includes the correctsts:ExternalID.
- Click Next.
- In the Add Permissions section, attach the
AmazonRedshiftDataFullAccesspermission policy. Click Next:
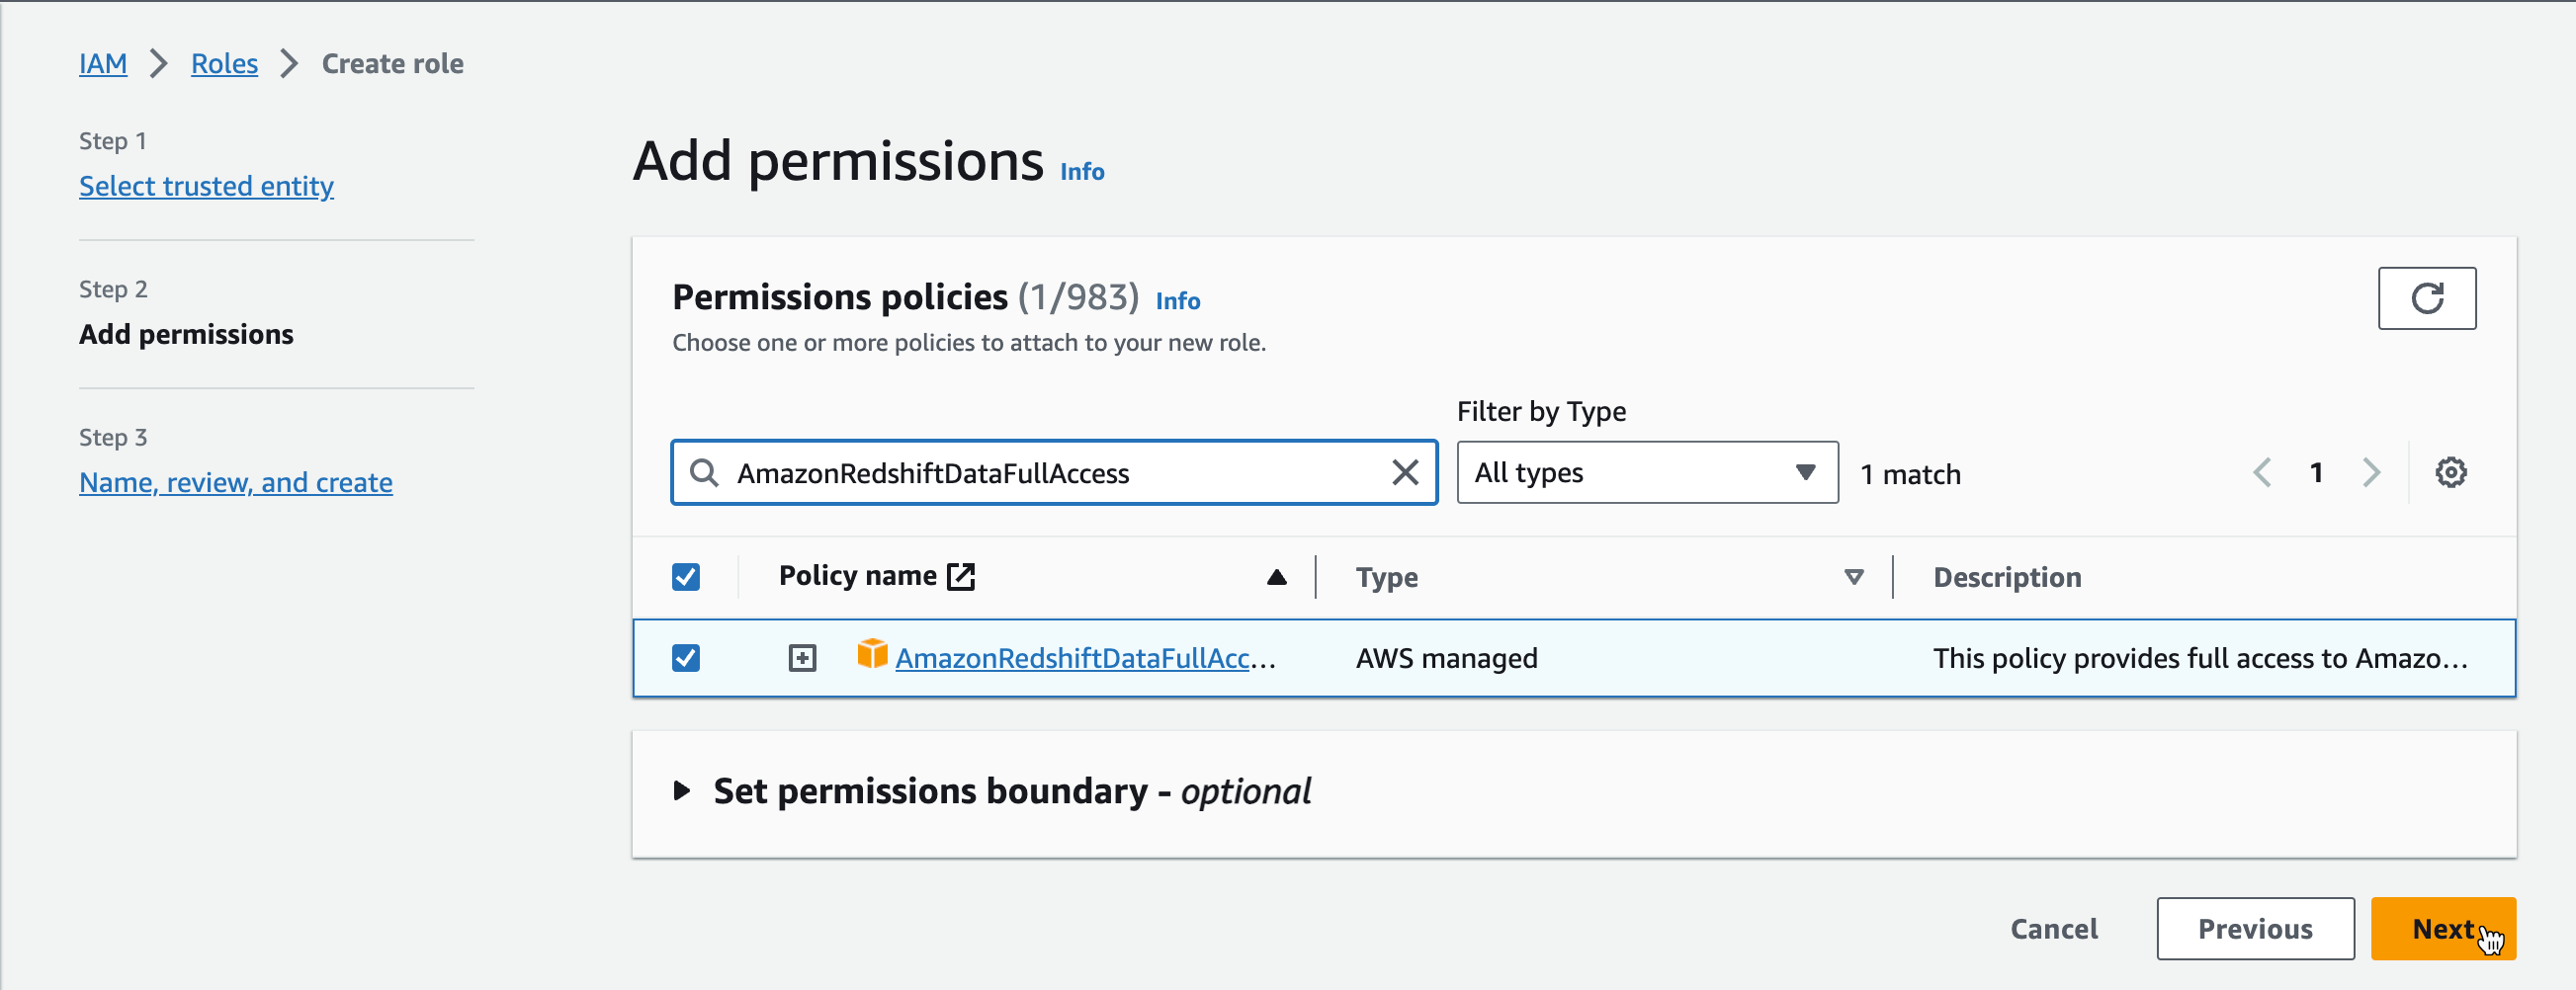
Make sure this policy allows action secretsmanager:GetSecretValueon for the resource pointed by the SecretARN. When this action is missing, read Prerequisites.
- Click Next and save the role. Then, copy its IAM Role ARN to the Data source wizard in Nobl9 UI.
Adding Amazon Redshift as a data source
To ensure data transmission between Nobl9 and your data source, it may be necessary to list Nobl9 IP addresses as trusted.
- 18.159.114.21
- 18.158.132.186
- 3.64.154.26
You can add the Amazon Redshift data source using the direct or agent connection methods. For both methods, start with these steps:
- Navigate to Integrations > Sources.
- Click
 .
. - Click the relevant Source icon.
- Choose a relevant connection method (Agent or Direct), then configure the source as described below.
Amazon Redshift direct
Direct configuration in the UI
Direct connection to Amazon Redshift requires users to enter their credentials which Nobl9 stores safely. To set up this type of connection:
-
Select one of the following Release Channels:
- The
stablechannel is fully tested by the Nobl9 team. It represents the final product; however, this channel does not contain all the new features of abetarelease. Use it to avoid crashes and other limitations. - The
betachannel is under active development. Here, you can check out new features and improvements without the risk of affecting any viable SLOs. Remember that features in this channel may be subject to change.
- The
-
Enter your AWS Secret ARN (mandatory).
The secret must be tagged withRedshiftDataFullAccesspermission. For more information, see Data API | Amazon Redshift documentation -
Enter the IAM Role ARN.
Check the instructions above for more details.
- Select a Project.
Specifying a project is helpful when multiple users are spread across multiple teams or projects. When the Project field is left blank, Nobl9 uses thedefaultproject. - Enter a Display Name.
You can enter a user-friendly name with spaces in this field. - Enter a Name.
The name is mandatory and can only contain lowercase, alphanumeric characters, and dashes (for example,my-project-1). Nobl9 duplicates the display name here, transforming it into the supported format, but you can edit the result. - Enter a Description.
Here you can add details such as who is responsible for the integration (team/owner) and the purpose of creating it. - Specify the Query delay to set a customized delay for queries when pulling the data from the data source.
- The default value in Amazon Redshift integration for Query delay is
30 seconds.
infoChanging the Query delay may affect your SLI data. For more details, check the Query delay documentation. - The default value in Amazon Redshift integration for Query delay is
- Click Add Data Source
Direct using CLI - YAML
The YAML for setting up a direct connection to Amazon Redshift looks like this:
apiVersion: n9/v1alpha
kind: Direct
metadata:
  name: redshift-direct
  displayName: Redshift Direct
  project: redshift-direct
spec:
  sourceOf:
    - Metrics
  releaseChannel: beta
  queryDelay:
      unit: Minute
      value: 720
  logCollectionEnabled: false
  redshift:
    roleARN: ""
    secretARN: ""
| Field | Type | Description |
|---|---|---|
queryDelay.unitmandatory | enum | Specifies the unit for the query delay. Possible values: Second | Minute. • Check query delay documentation for default unit of query delay for each source. |
queryDelay.value mandatory | numeric | Specifies the value for the query delay. • Must be a number less than 1440 minutes (24 hours). • Check query delay documentation for default unit of query delay for each source. |
logCollectionEnabledoptional | boolean | Optional. Defaults to false. Set to true if you'd like your direct to collect event logs. Beta functionality available only through direct release channel. Reach out to support@nobl9.com to activate it. |
releaseChannelmandatory | enum | Specifies the release channel. Accepted values: beta | stable. |
| Source-specific fields | ||
redshift.roleARNmandatory | string, secret | See authentication section above for more details. |
redshift.secretARNmandatory | string, secret | See authentication section above for more details. |
Amazon Redshift agent
Agent configuration in the UI
Follow the instructions below to create your Amazon Redshift agent connection. Refer to the section above for the description of the fields.
- Enter a Project.
- Enter a Display Name.
- Enter a Name.
- Create a Description.
- Customize the Query Delay.
- Click Add Data Source
Agent using CLI - YAML��
The YAML for setting up an agent connection to Amazon Redshift looks like this:
apiVersion: n9/v1alpha
kind: Agent
metadata:
  name: redshift-agent
  displayName: Redshift Agent # optional
  project: default
spec:
  description: Agent settings for redshift datasource # optional
  sourceOf:
    - Metrics
  releaseChannel: beta # string, one of: beta || stable
  queryDelay:
      unit: Minute # string, one of: Second || Minute
      value: 720 # numeric, must be a number less than 1440 minutes (24 hours)
  redshift: {}
| Field | Type | Description |
|---|---|---|
queryDelay.unitmandatory | enum | Specifies the unit for the query delay. Possible values: Second | Minute. • Check query delay documentation for default unit of query delay for each source. |
queryDelay.value mandatory | numeric | Specifies the value for the query delay. • Must be a number less than 1440 minutes (24 hours). • Check query delay documentation for default unit of query delay for each source. |
releaseChannelmandatory | enum | Specifies the release channel. Accepted values: beta | stable. |
You can deploy only one agent in one YAML file by using the sloctl apply command.
Deploying Amazon Redshift agent
When you add the data source, Nobl9 automatically generates a Kubernetes configuration and a Docker command line for you to use to deploy the agent. Both of these are available in the web UI, under the Agent Configuration section. Be sure to swap in your credentials (e.g., replace <AWS_SECRET_ARN>, <AWS_ACCESS_KEY_ID>, and <AWS_SECRET_ACCESS_KEY> with your organization key).
- Kubernetes
- Docker
If you use Kubernetes, you can apply the supplied YAML config file to a Kubernetes cluster to deploy the agent. It will look something like this:
# DISCLAIMER: This deployment description contains only the fields necessary for the purpose of this demo.
# It is not a ready-to-apply k8s deployment description, and the client_id and client_secret are only exemplary values.

apiVersion: v1
kind: Secret
metadata:
  name: nobl9-agent-nobl9-dev-default-my-amazon-redshift
  namespace: default
type: Opaque
stringData:
  aws_access_key_id: <AWS_ACCESS_KEY_ID>
  aws_secret_access_key: <AWS_SECRET_ACCESS_KEY>
  aws_secret_arn: <AWS_SECRET_ARN>
  client_id: client_id
  client_secret: client_secret
---
apiVersion: apps/v1
kind: Deployment
metadata:
  name: nobl9-agent-nobl9-dev-default-my-amazon-redshift
  namespace: default
spec:
  replicas: 1
  selector:
    matchLabels:
      nobl9-agent-name: my-amazon-redshift
      nobl9-agent-project: default
      nobl9-agent-organization: nobl9-dev
  template:
    metadata:
      labels:
        nobl9-agent-name: my-amazon-redshift
        nobl9-agent-project: default
        nobl9-agent-organization: nobl9-dev
    spec:
      containers:
        - name: agent-container
          image: nobl9/agent:0.73.2
          resources:
            requests:
              memory: "350Mi"
              cpu: "0.1"
          env:
            - name: N9_CLIENT_ID
              valueFrom:
                secretKeyRef:
                  key: client_id
                  name: nobl9-agent-nobl9-dev-default-my-amazon-redshift
            - name: AWS_ACCESS_KEY_ID
              valueFrom:
                secretKeyRef:
                  key: aws_access_key_id
                  name: nobl9-agent-nobl9-dev-default-my-amazon-redshift
            - name: AWS_SECRET_ACCESS_KEY
              valueFrom:
                secretKeyRef:
                  key: aws_secret_access_key
                  name: nobl9-agent-nobl9-dev-default-my-amazon-redshift
            - name: AWS_SECRET_ARN
              valueFrom:
                secretKeyRef:
                  key: aws_secret_arn
                  name: nobl9-agent-nobl9-dev-default-my-amazon-redshift
            - name: N9_CLIENT_SECRET
              valueFrom:
                secretKeyRef:
                  key: client_secret
                  name: nobl9-agent-nobl9-dev-default-my-amazon-redshift
            # The N9_METRICS_PORT is a variable specifying the port to which the /metrics and /health endpoints are exposed.
            # The 9090 is the default value and can be changed.
            # If you don’t want the metrics to be exposed, comment out or delete the N9_METRICS_PORT variable.
            - name: N9_METRICS_PORT
              value: "9090"
If you use Docker, you can run the Docker command to deploy the agent. It will look something like this:
# DISCLAIMER: This Docker command contains only the fields necessary for the purpose of this demo.
# It is not a ready-to-apply command, and you will need to replace the placeholder values with your own values.

docker run -d --restart on-failure \
  --name nobl9-agent-nobl9-dev-default-my-amazon-redshift \
  -e N9_CLIENT_SECRET="client_secret" \
  -e N9_CLIENT_ID="client_id" \
  # The N9_METRICS_PORT is a variable specifying the port to which the /metrics and /health endpoints are exposed.
  # The 9090 is the default value and can be changed.
  # If you don’t want the metrics to be exposed, comment out or delete the N9_METRICS_PORT variable.
  -e N9_METRICS_PORT=9090 \
  -e AWS_ACCESS_KEY_ID="<AWS_ACCESS_KEY_ID>" \
  -e AWS_SECRET_ACCESS_KEY="<AWS_SECRET_ACCESS_KEY>" \
  -e AWS_SECRET_ARN="<AWS_SECRET_ARN>" \
  nobl9/agent:0.73.2
Creating SLOs with Amazon Redshift
Creating SLOs in the UI
Follow the instructions below to create your SLOs with Amazon Redshift in the UI:
-
Navigate to Service Level Objectives.
-
Click.
-
In step 1 of the SLO wizard, select the Service the SLO will be associated with.
-
In step 2, select Redshift as the data source for your SLO.
-
Enter a Region (mandatory).
Use one of the regional endpoints that are listed here. -
Enter a Cluster ID (mandatory).
It is an identifier of your Amazon Redshift cluster that is a part of your Redshift secret. For more details on Redshift, secrets go here. For exampleredshift-cluster-1. -
Enter a Database name (mandatory).
It is the name of your Amazon Redshift database. For exampledev. -
Select a metric type. You can choose between two types of metrics:
-
A Threshold Metric is a single time series evaluated against a threshold.
-
A Ratio Metric allows you to enter two-time series to compare (for example, a count of good requests and total requests).
- Choose the Data Count Method for your ratio metric:
- Non-incremental: counts incoming metric values one-by-one. So the resulting SLO graph is pike-shaped.
- Incremental: counts the incoming metric values incrementally, adding every next value to previous values.
It results in a constantly increasing SLO graph.
- Choose the Data Count Method for your ratio metric:
-
-
Enter a Query or Good query and Total query:
-
Query example for the Threshold metric (Raw metric):
Query:SELECT value as n9_value, timestamp as n9_time FROM httpstatuscodes WHERE timestamp BETWEEN :n9date_from AND :n9date_to -
Query example for the Ratio metric (count metric):
Good query:SELECT value as n9value, timestamp as n9date FROM httpstatuscodes WHERE timestamp BETWEEN :n9date_from AND :n9date_to
Total query:SELECT value as n9value, timestamp as n9date FROM sinusoid WHERE timestamp BETWEEN :n9date_from AND :n9date_to
SLI values for good and totalWhen choosing the query for the ratio SLI (countMetrics), keep in mind that the values resulting from that query for both good and total:- Must be positive.
- While we recommend using integers, fractions are also acceptable.
- If using fractions, we recommend them to be larger than
1e-4=0.0001. - Shouldn't be larger than
1e+20.
-
-
-
In step 3, define a Time Window for the SLO.
-
In step 4, specify the Error Budget Calculation Method and your Objective(s).
-
In step 5, add a Name, Description, and other details about your SLO. You can also select Alert Policies and Labels on this screen.
-
When you’re done, click Create SLO.
SLOs using Amazon Redshift - YAML samples
- rawMetric
- countMetric
Here’s an example of Amazon Redshift using a rawMetric (threshold metric)
apiVersion: n9/v1alpha
kind: SLO
metadata:
  name: redshift-raw
  displayName: Redshift Raw SLO
  project: redshift
spec:
  description: Redshift SLO Description
  service: redshift
  indicator:
    metricSource:
      name: redshift
      project: redshift
  budgetingMethod: Occurrences
  objectives:
  - target: 0.8
    value: 0.8
    op: lte
    rawMetric:
      query:
        redshift:
         region: eu-central-1
         clusterId: n9-dev-tooling-redshift
         databaseName: dev
         query: SELECT value as n9value, timestamp as n9date FROM sinusoid WHERE
              timestamp BETWEEN :n9date_from AND :n9date_to
    displayName: average
  - target: 0.9
    value: 0.9
    op: lte
    rawMetric:
      query:
        redshift:
         region: eu-central-1
         clusterId: n9-dev-tooling-redshift
         databaseName: dev
         query: SELECT value as n9value, timestamp as n9date FROM sinusoid WHERE
              timestamp BETWEEN :n9date_from AND :n9date_to
    displayName: so-so
  timeWindows:
  - calendar:
      startTime: "2020-11-14 11:00:00"
      timeZone: Etc/UTC
    count: 1
    isRolling: false
    unit: Day
Here’s an example of Amazon Redshift using countMetric (ratio metric):
apiVersion: n9/v1alpha
kind: SLO
metadata:
  name: redshift-count
  displayName: Redshift Count SLO
  project: redshift
spec:
  description: Redshift Count Description
  service: redshift
  indicator:
    metricSource:
      name: redshift
      project: redshift
  budgetingMethod: Occurrences
  timeWindows:
    - unit: Day
      count: 7
      isRolling: true
  objectives:
  - countMetrics:
      incremental: false
      good:
        redshift:
          clusterId: n9-dev-tooling-redshift
          databaseName: dev
          query: SELECT value as n9value, timestamp as n9date FROM httpstatuscodes
            WHERE value = '200' AND timestamp BETWEEN :n9date_from AND :n9date_to
          region: eu-central-1
      total:
        redshift:
          clusterId: n9-dev-tooling-redshift
          databaseName: dev
          query: SELECT value as n9value, timestamp as n9date FROM httpstatuscodes
            WHERE timestamp BETWEEN :n9date_from AND :n9date_to
          region: eu-central-1
    displayName: ""
    target: 0.99
    value: 1
The Amazon Redshift SLO requires the following fields:
-
region -
clusterID -
databaseName -
Refer to Creating SLOs in the UI section for more details on these fields.
n9date and n9value:
Amazon Redshift SQL query needs to return two values - n9date and n9value:
-
n9dateis the timestamp for the data. -
n9valueis a float containing the actual metric.Note that Amazon RedShift accepts these values in the following format:
-
:n9date_from -
:n9date_to
This allows users to enter virtually any query.
-
Querying the Amazon Redshift server
To call the AWS Redshift Data API, Nobl9 runs the aws redshift-data execute-statement command that is executed once per minute. Nobl9 queries for data from the previous minute.
Amazon Redshift API rate limits
The following rate limits apply to the Amazon Redshift API:
-
The maximum query result size is 100 MB. If a call returns more than 100 MB of response data, the call is ended.
-
The maximum retention time for query results is 24 hours.
-
The maximum query statement size is 100 KB.
-
The Data API is available to query single-node and multiple-node clusters of the following node types:
- dc2.large
- dc2.8xlarge
- ds2.xlarge
- ds2.8xlarge
- ra3.xlplus
- ra3.4xlarge
- ra3.16xlarge
-
The cluster must be in a virtual private cloud (VPC) based on the Amazon VPC service.

