Create a project
Projects are the primary logical grouping of resources in the Nobl9 platform. All Nobl9 resources, such as data sources, SLOs, and alerts, are created within projects.
Project-level access determines who can see and change resources within that project. You can, for example, allow everyone in your organization to view SLOs in a project, but limit editing rights to specific users.
For more details, go back to the Get started > Role-based access control topic.
A project is required to create a service which you select later to create an SLO.
Step-by-step
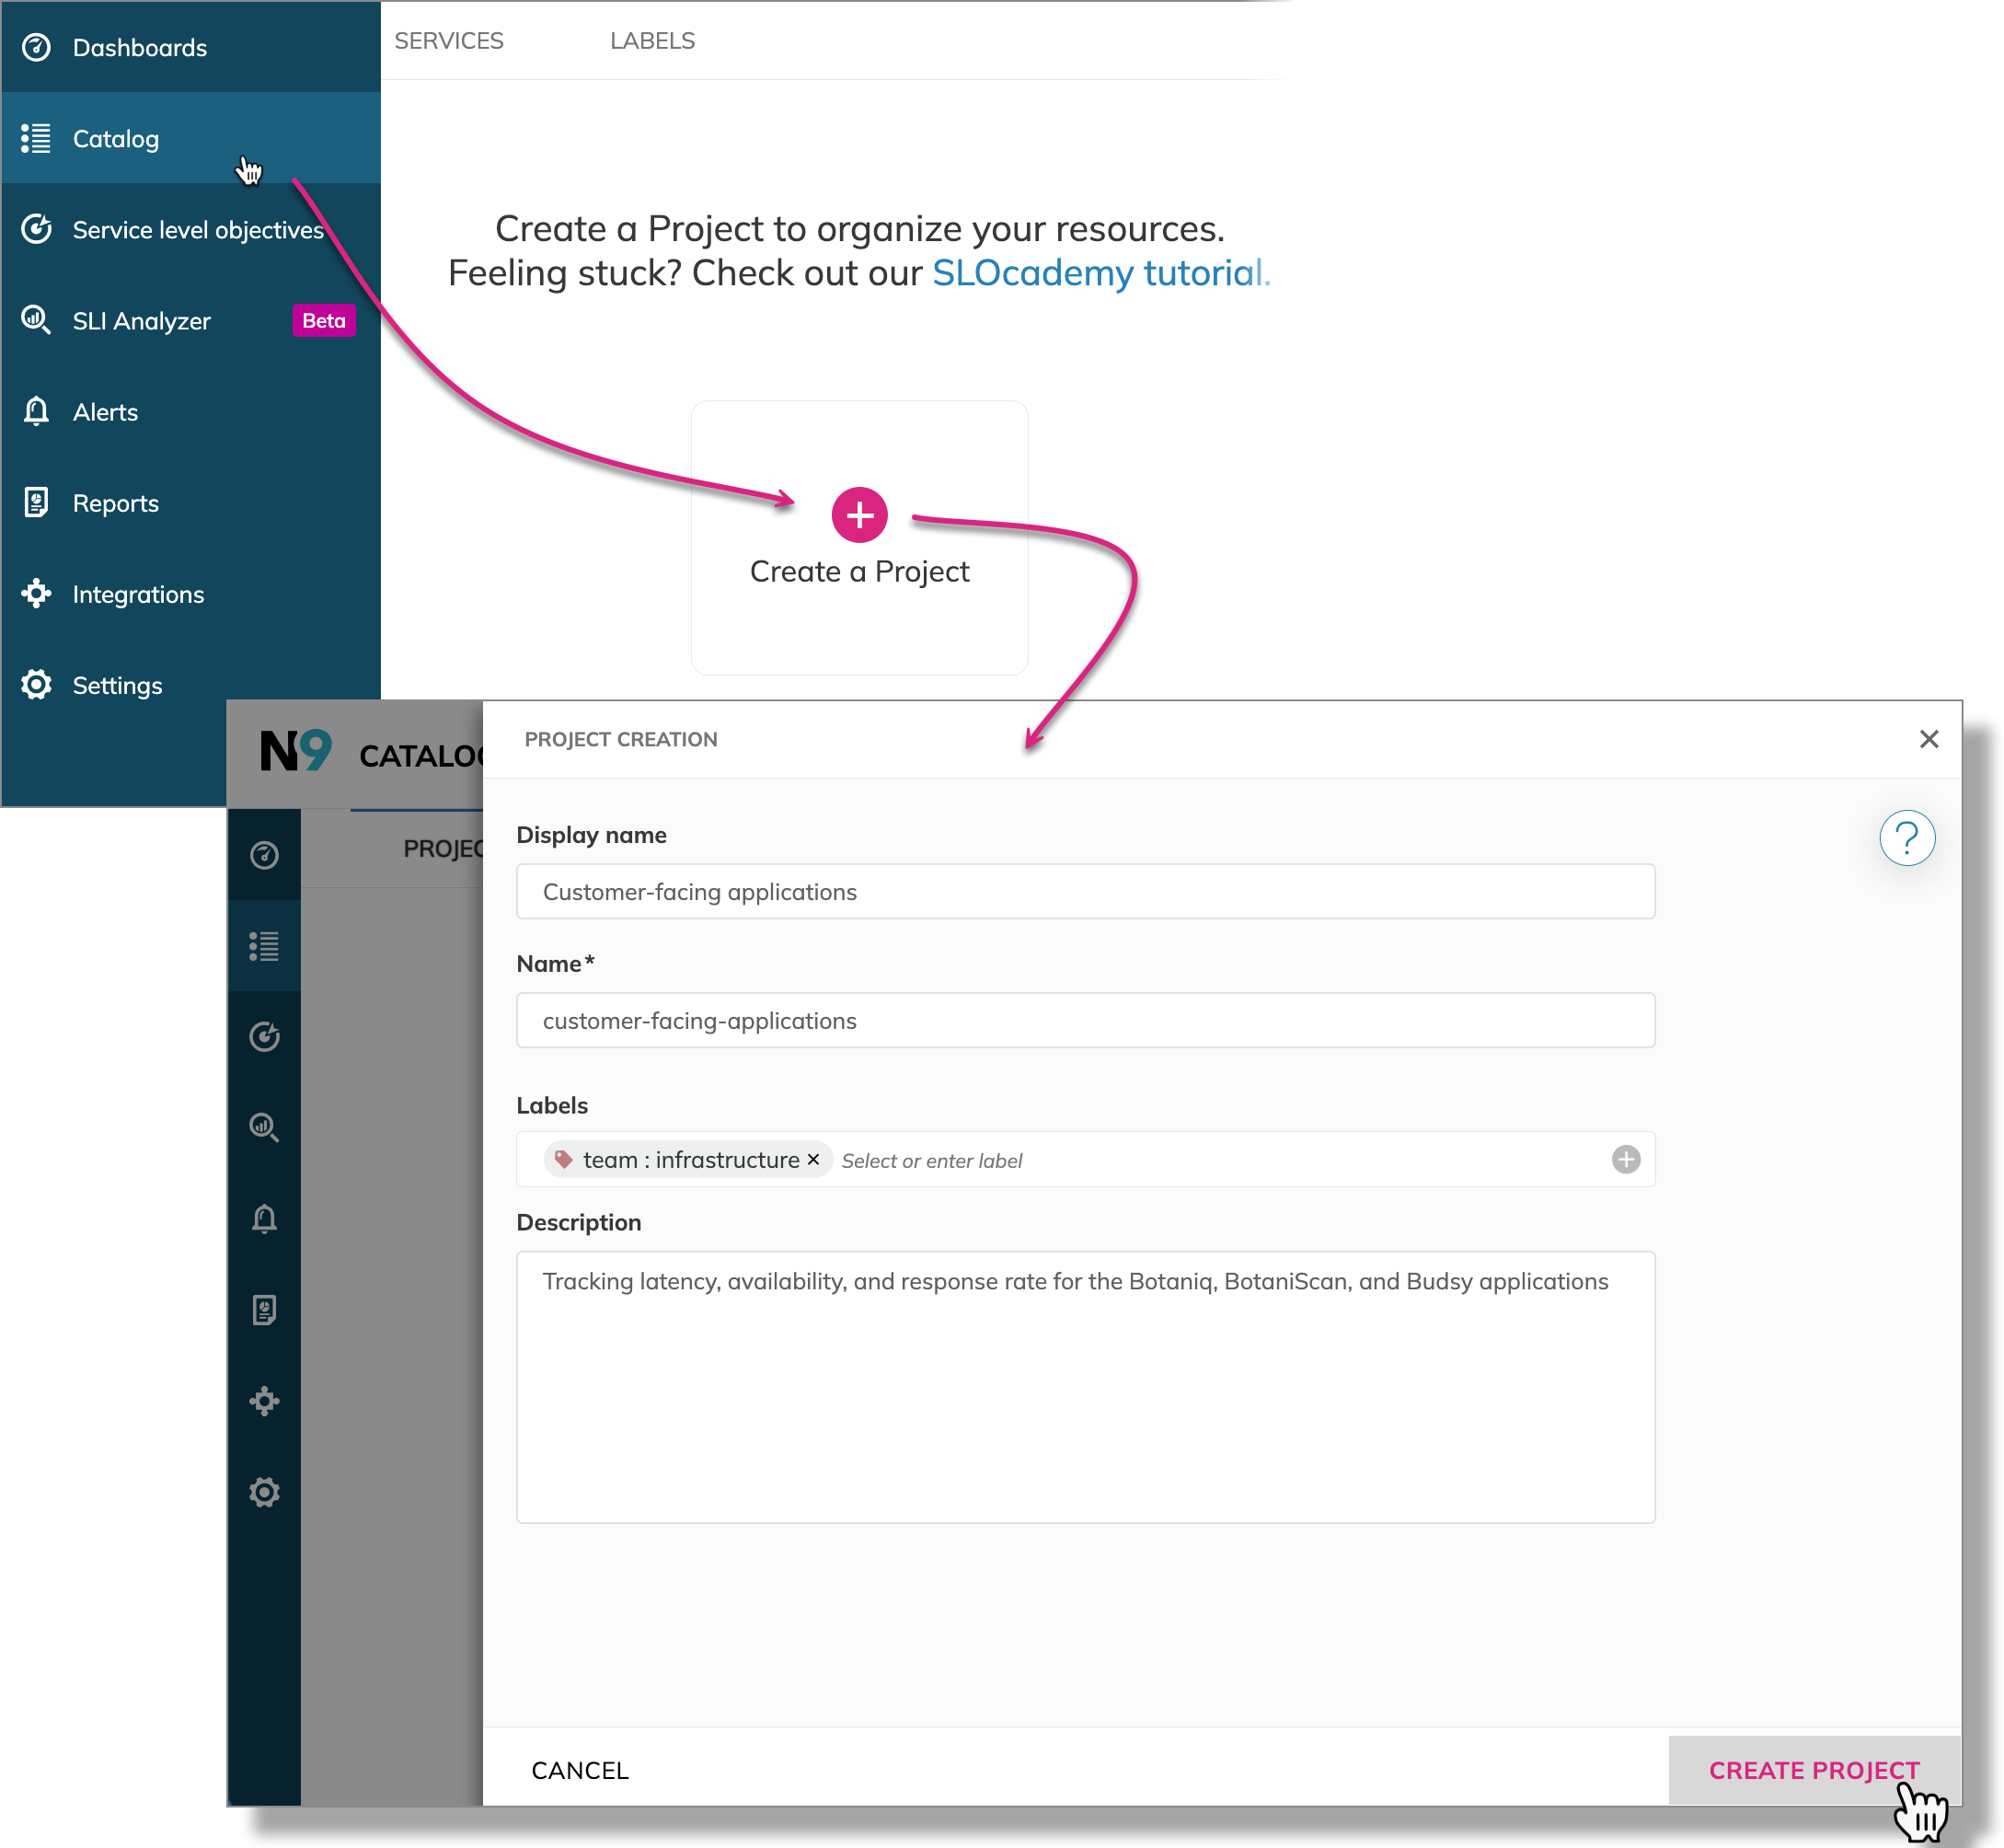
To create a project on the Nobl9 Web:
- Go to Catalog > Projects.
- Click
 .
. - Enter a Display Name (optional).
Spaces are allowed. - Enter a Name (mandatory).
The name is mandatory and can only contain lowercase, alphanumeric characters, and dashes (for example,my-project-1). Nobl9 duplicates the display name here, transforming it into the supported format, but you can edit the result. - Select or add Labels.
Labels have a specific format and must conform to the following rules:-
key: valueformat -
keycan contain only lowercase alphanumeric characters, underscores, and dashes; must start with a letter and end with an alphanumeric character; maximum length 63 characters -
valuecan contain Unicode characters; maximum length 200 characters - Maximum of 30 labels attached
-
- Enter a Description (optional).
Provide extra details, such as the purpose and responsible personnel.
Up to 1050 characters. - Click Create project
Tips on naming and structuring
Projects act as containers to organize resources like SLOs, services, and data sources.
If you're unsure how to proceed, here are some examples of naming and structure to give you a clearer idea of how things could be organized: