Access control in Nobl9
Nobl9 supports role-based access control (RBAC) to ensure granular user permissions and access to resources in the Nobl9 platform.
Nobl9 RBAC features two levels of permissions: organization and project.
Role management is available in Nobl9 Web and with sloctl using Role Binding.
Although the majority of operations a Nobl9 user can perform depends on their role, all users can do the following:
- Reset their passwords
Once a user clicks Forgot password, their status sets to Recovery and goes back to Active after the user submits their new password. - Generate access keys
Project management
This section describes options available for the full permission set. Your available options depend on your Organization-level and Project-level role.
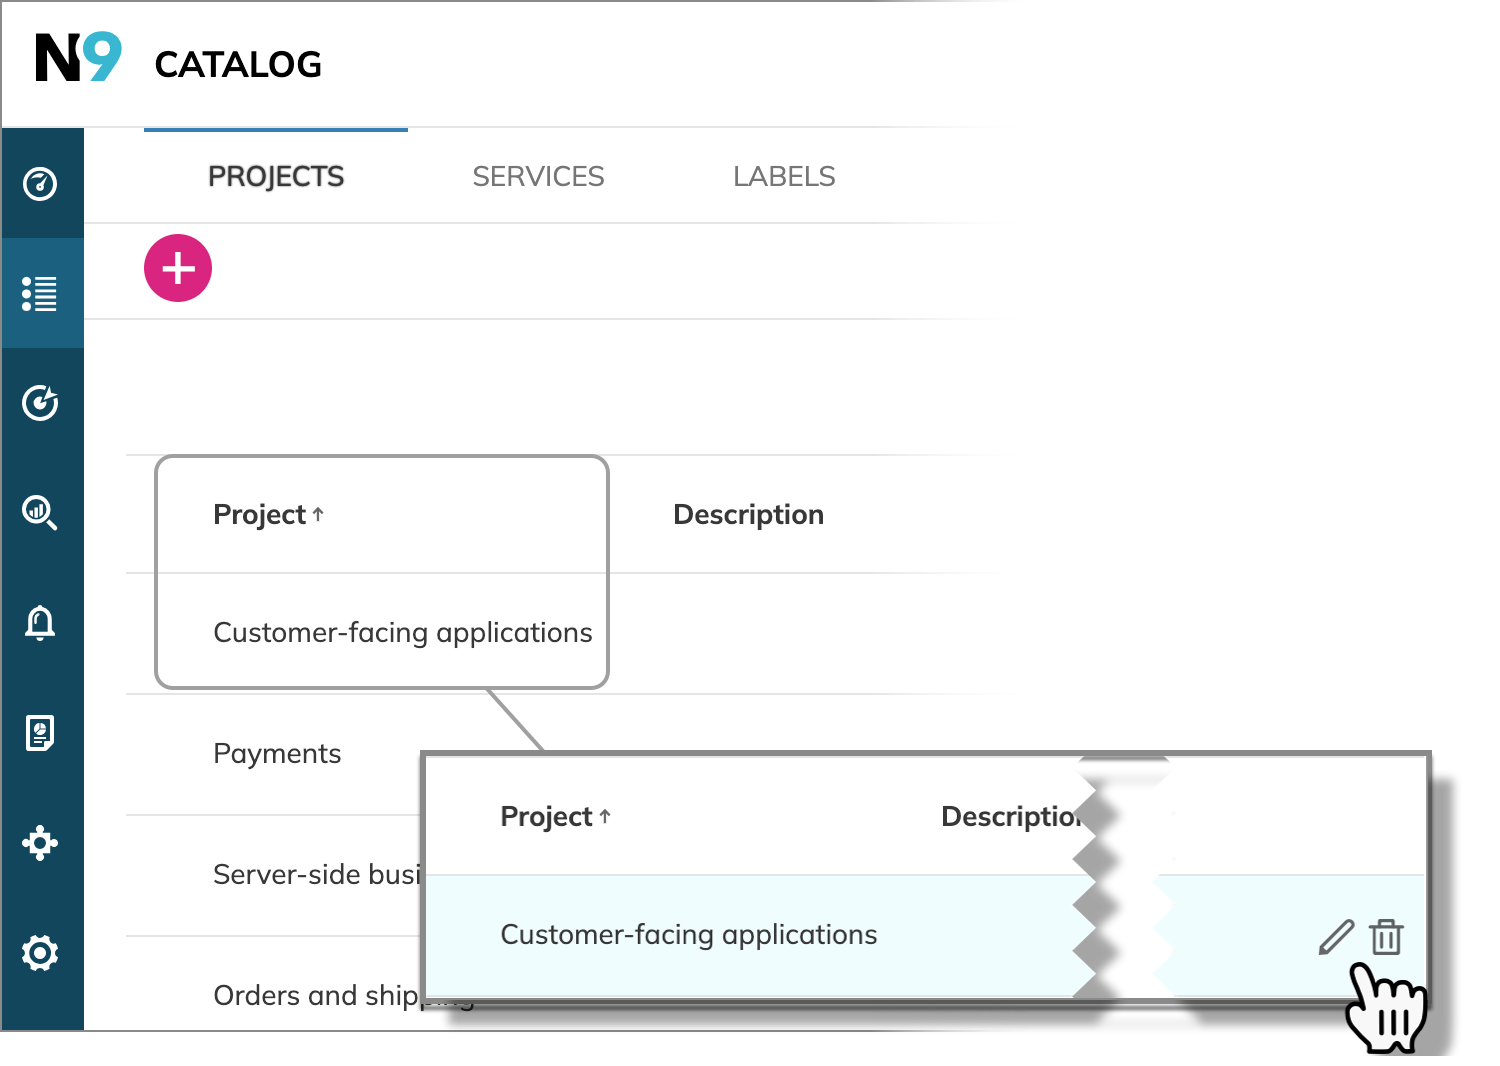
Users can manage their projects and access them on the project details page.
To access your required project, click Catalog in the left navigation menu. Under the Project tab, you can see the list of projects in your organization.
Hover the cursor over the required project to edit or delete the project.
You cannot delete a project that holds at least one resource.
Click the required project row to open its details with resource lists. The following options are available:
-
Edit and delete the resource
Resource deletionClick
 to delete a resource in your Nobl9 organization with all the associated resources.
For example:
- Deleting a service or a data source also deletes all SLOs it holds.
- Deleting an alert policy or alert method stops its notifications.
-
View details of the included resources and open their pages
-
Delete any applied labels to the included resources
-
Update the agent version under the Data sources tab
-
View the history of project changes
-
View and manage access to your project under the Users tab
To assign a user to the project, click
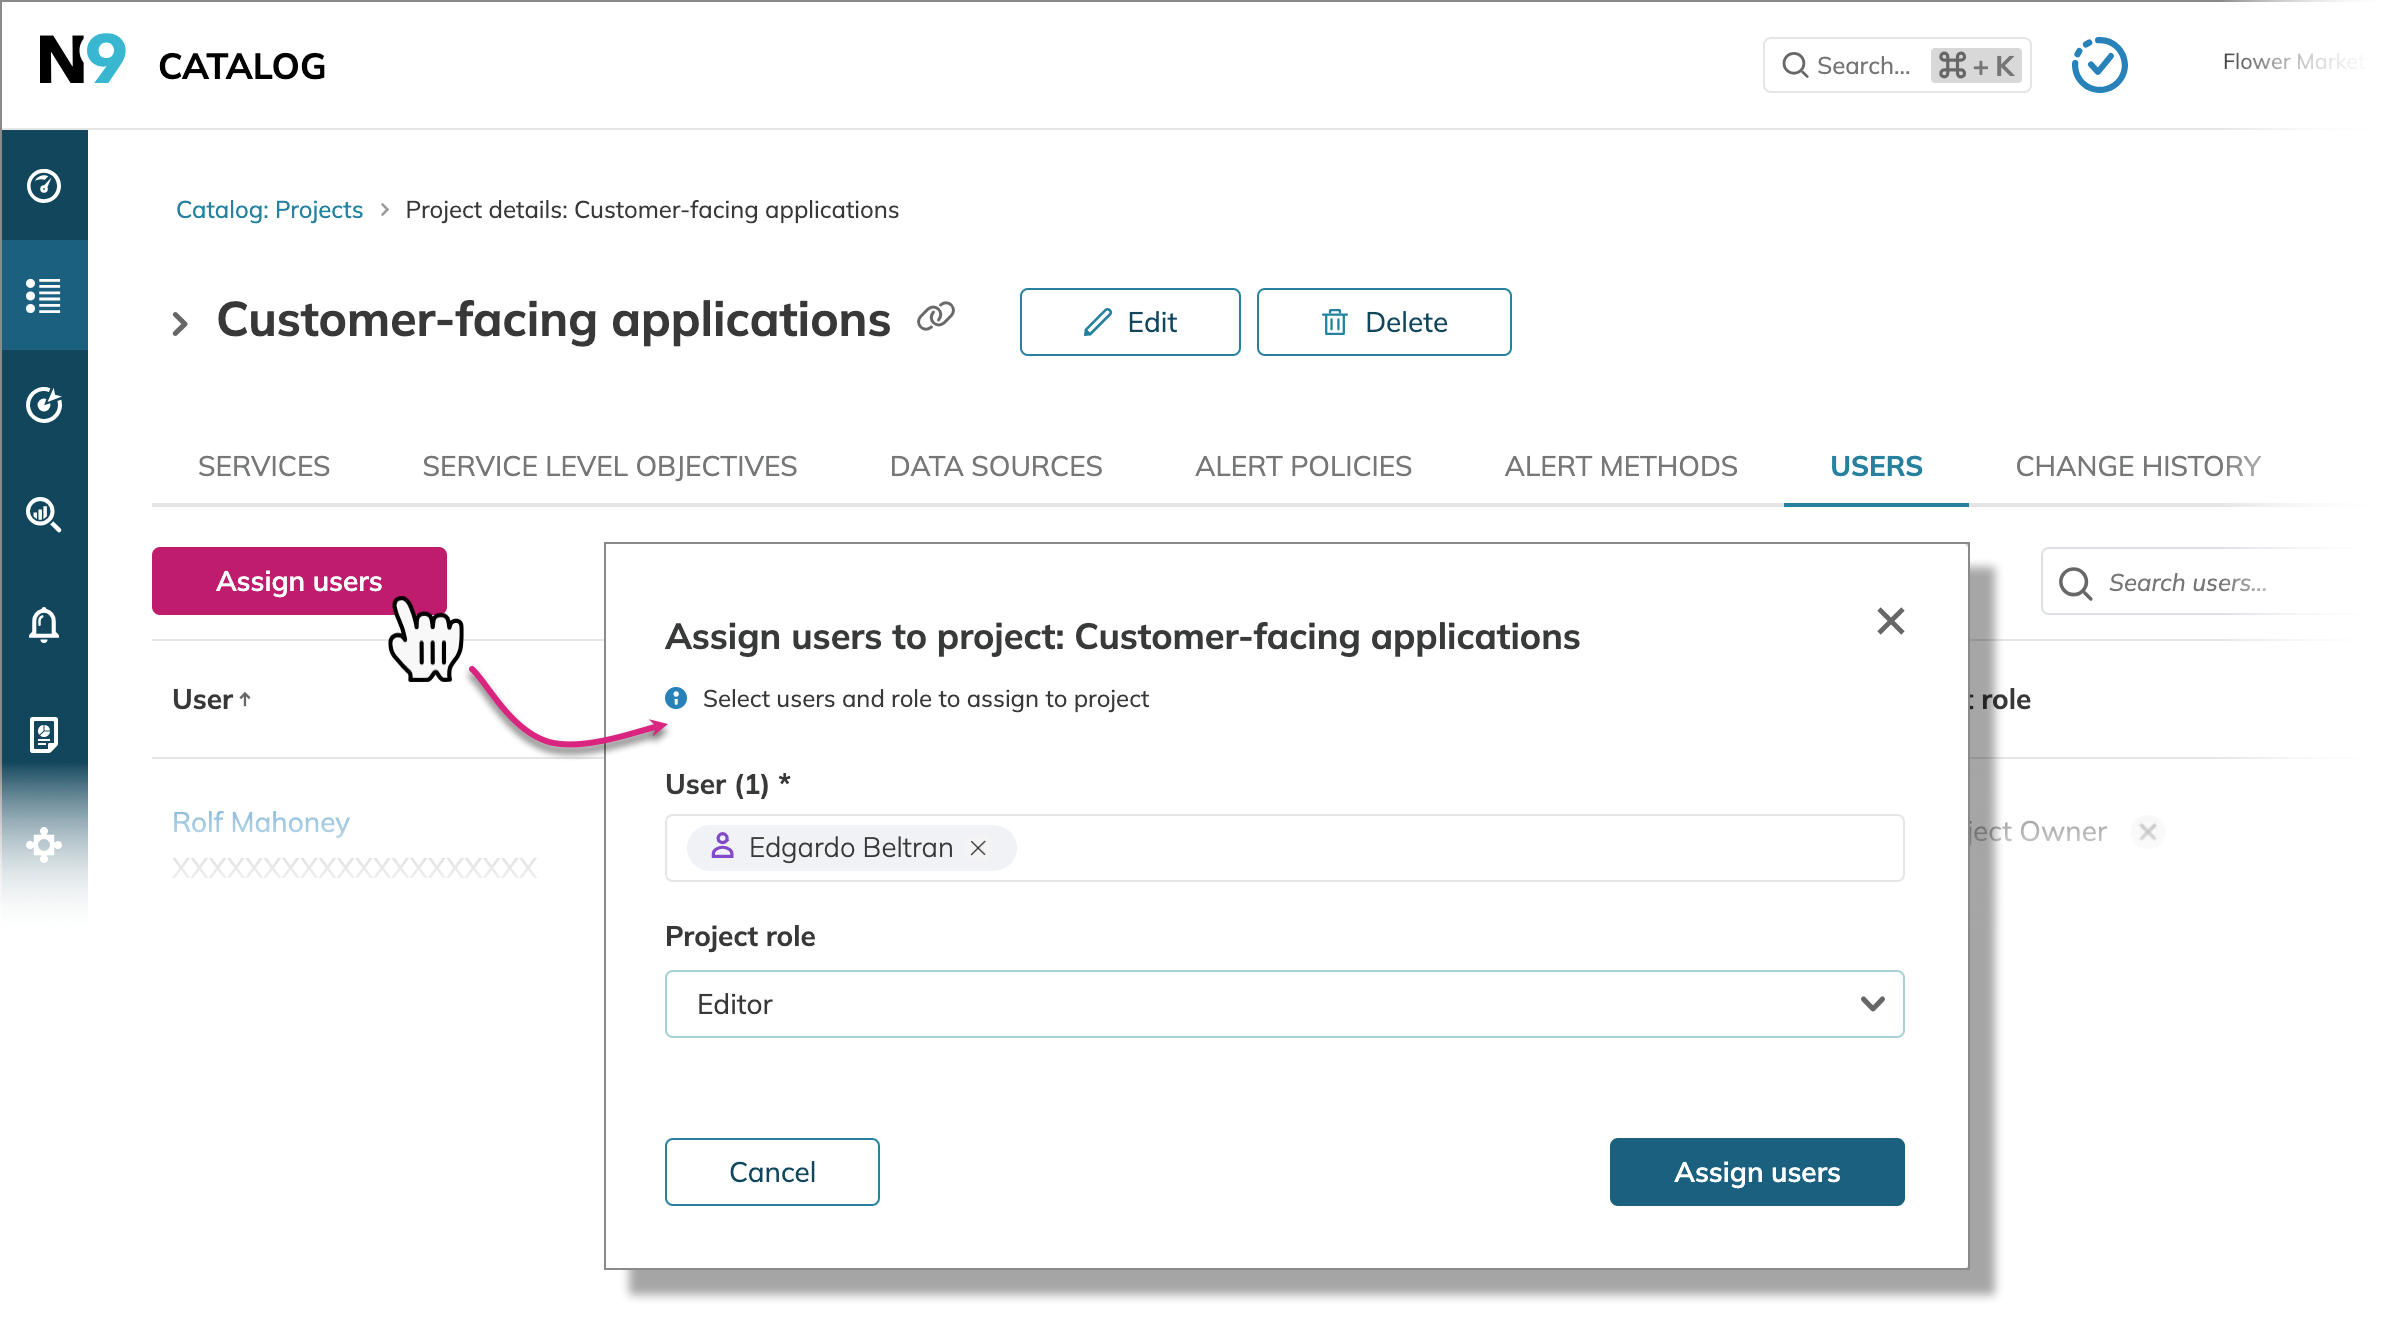
When editing a user's role, the new role permissions overwrite the previous role.
For example, when you change the role from Project editor to Project viewer,
the user or users from the group will lose their editor permissions.
To revoke user's access to the project, hover over the required user's row. Click X next to their role in the Project role column and confirm your action.
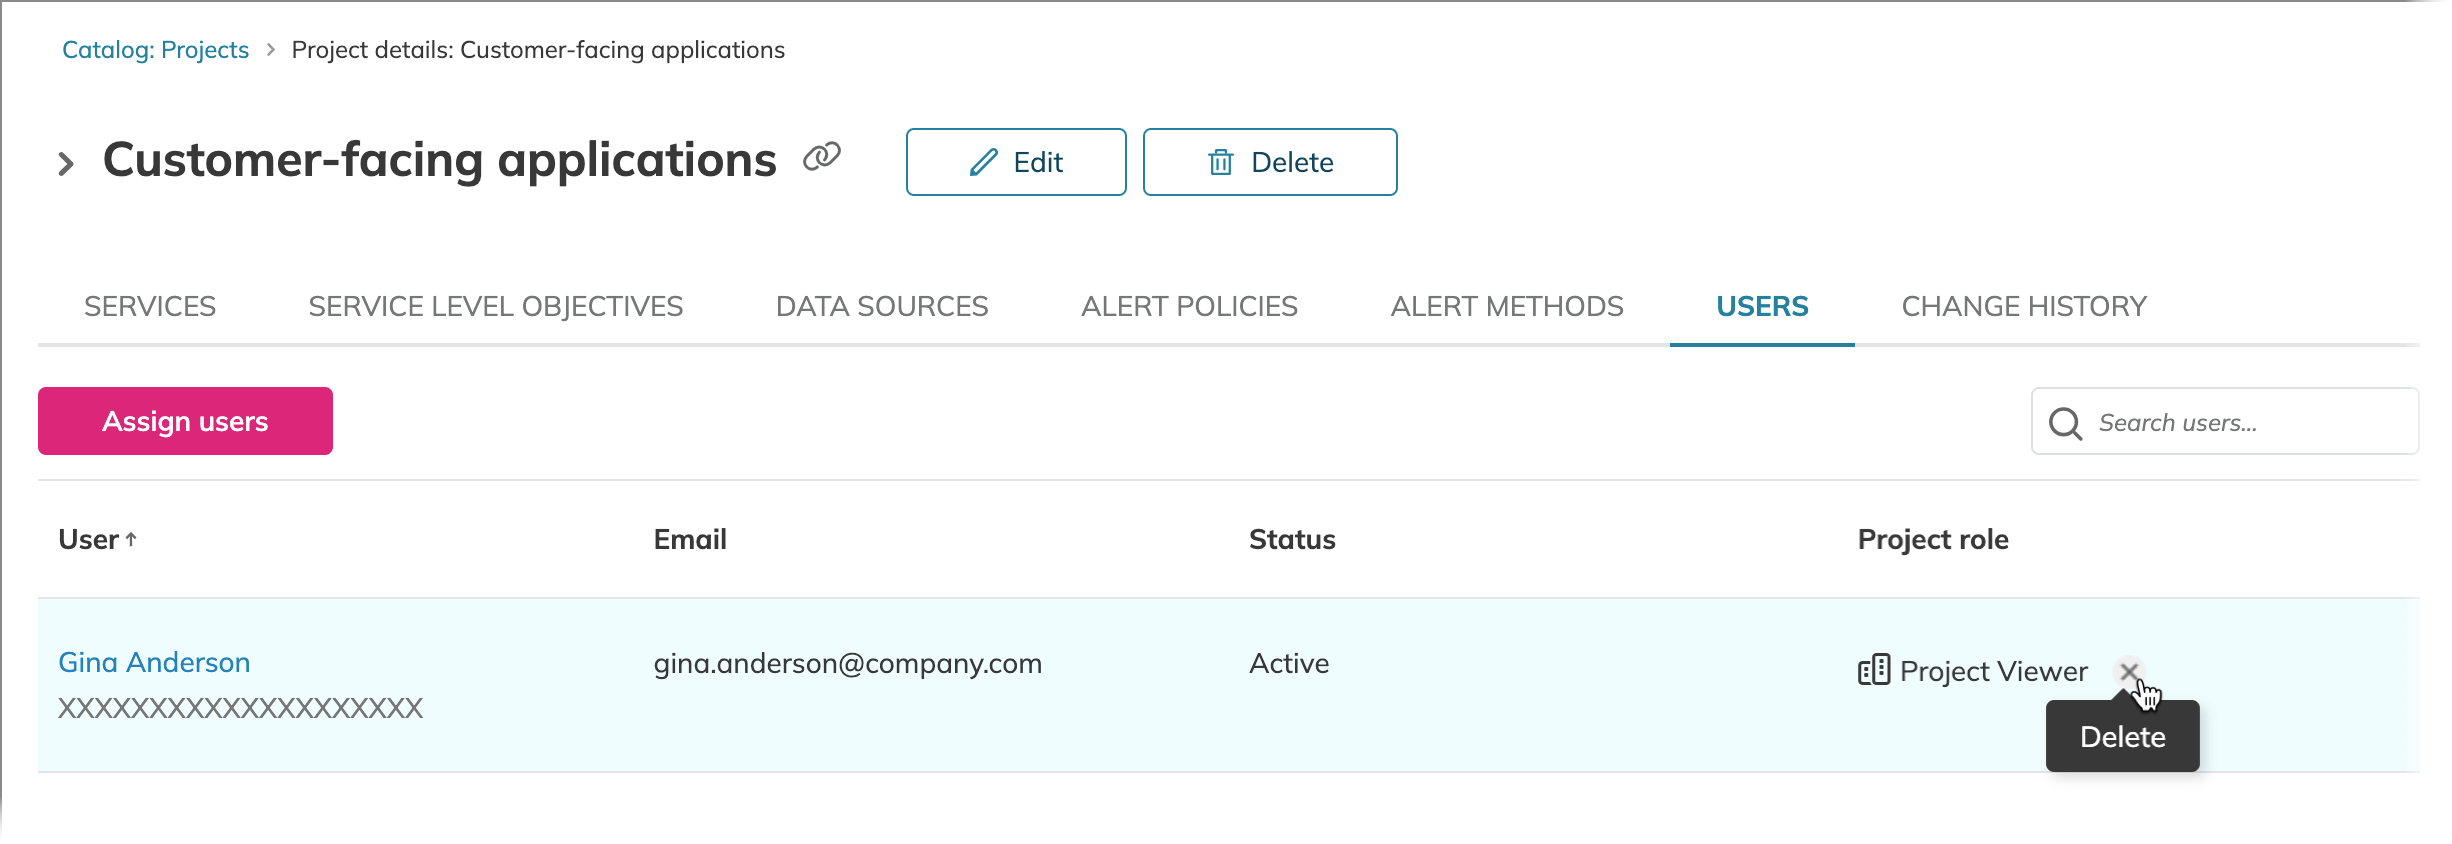
Deleting yourself as a project user permanently revokes your access to this project.
To restore your access, contact your organization admin or this project owner.
This is also true for the Organization admin role.