Deploy your Nobl9 agent
Once you create an agent, Nobl9 generates a Kubernetes configuration in YAML and a Docker command line you can use for deployment. You can deploy your agent in a Kubernetes cluster or Docker container.
Prerequisites
Before deployment, ensure your agent's network has an open outbound access using TCP port 443 to the following endpoints:
- Nobl9 Okta instance for identity management
- Nobl9 SaaS application to receive queries and send metrics
- Your data source API URL specified during agent creation to receive metrics and send queries
Nobl9 Okta and Nobl9 SaaS endpoints use Amazon ALB (Application Load Balancer), meaning their IP addresses may change over time.
Pulling the agent container image
The Nobl9 agent image is hosted on Docker Hub. Your Kubernetes cluster or container runtime must have access to Docker Hub to fetch this image—ensure outbound TCP port 443 is open to Docker Hub.
Alternatively, you can download the image and store it in a locally hosted artifact repository for deployment.
Nobl9 agent configuration
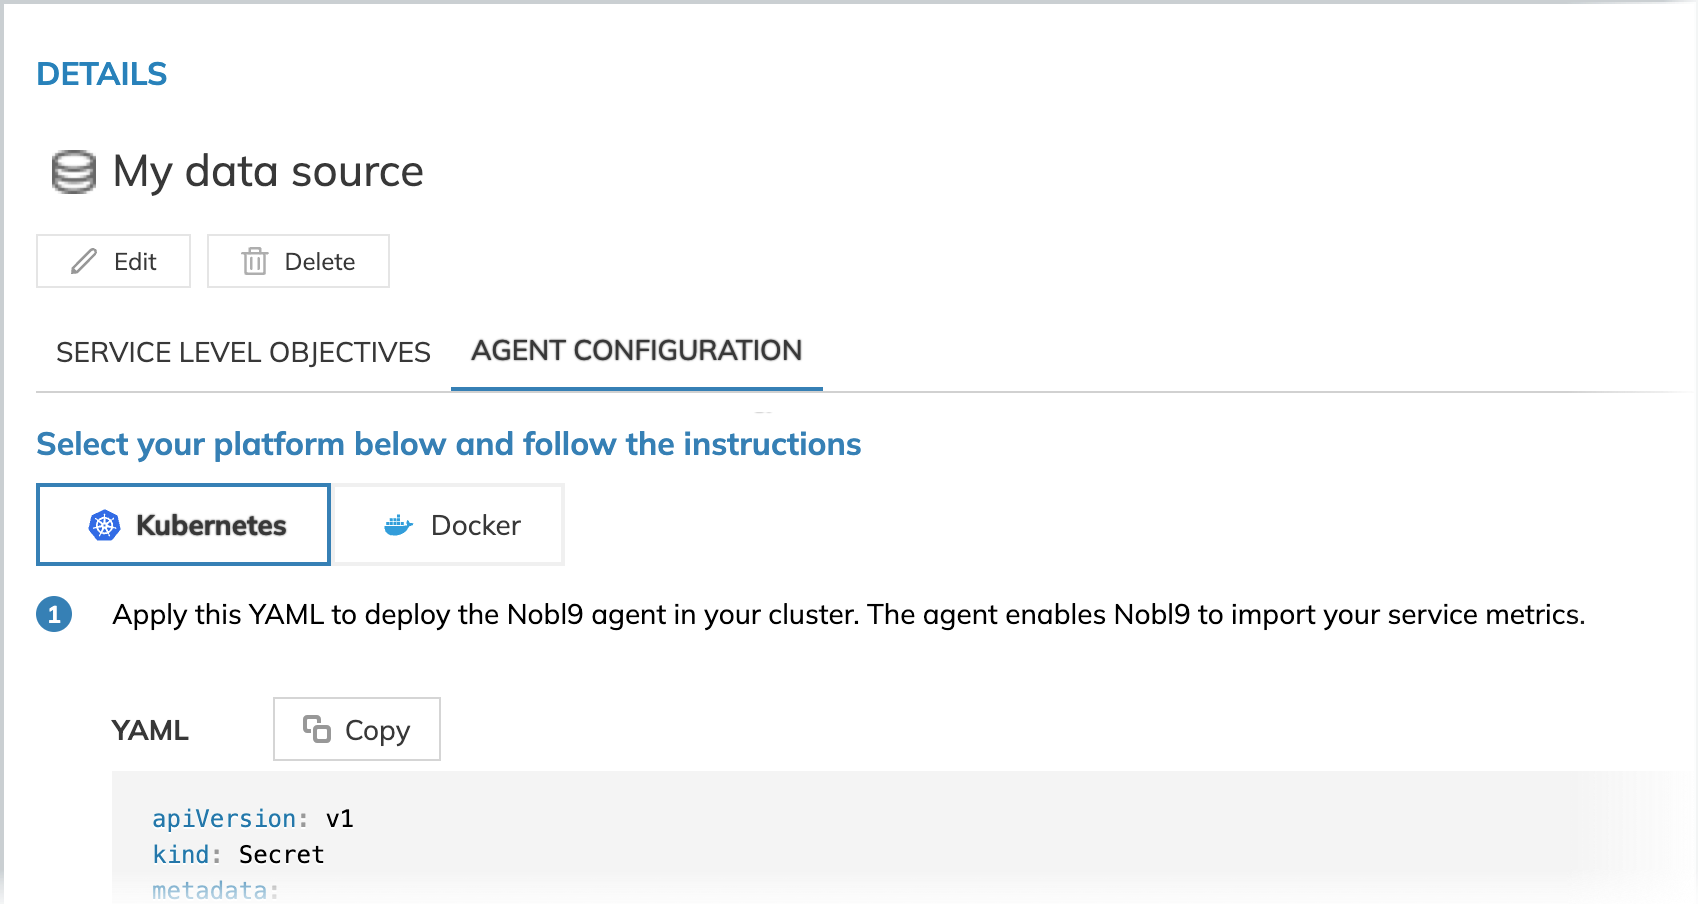
To access the configuration, do the following:
- Go to the Nobl9 Web > Integrations.
- Open your data source details on the Nobl9 Web. Click Agent configuration:
Authentication and authorization
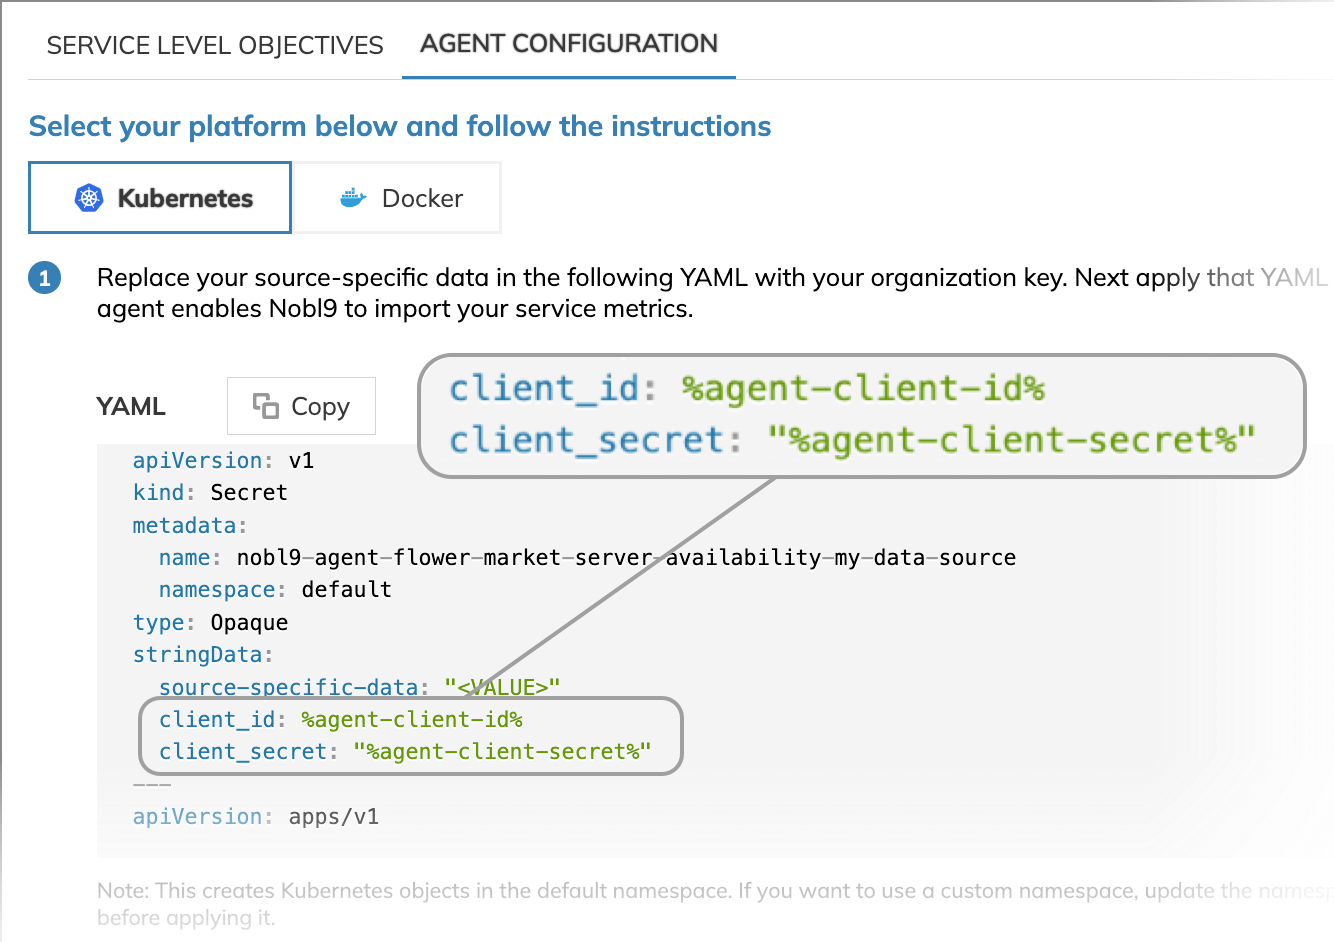
Along with configuration, Nobl9 generates unique OAuth2 credentials for your agent—Client ID and Client secret. Your agent uses them to:
- Connect securely to Nobl9 over outbound HTTPS
- Identify the agent instance
- Obtain query configurations from Nobl9
To access your agent credentials, open your data source details on the Nobl9 Web and go to Agent configuration. Find your agent credentials in the following fields:
| Configuration | Field names |
|---|---|
| Kubernetes | stringData.client_id and stringData.client_secret |
| Docker | N9_CLIENT_ID and N9_CLIENT_SECRET |
Alternatively,
run sloctl get agents
to retrieve your agent credentials for agent deployment.
Deploy the agent
Depending on your runtime environment, use the generated YAML manifest for Kubernetes or the Docker command for container deployment. Replace the placeholders with your agent credentials to ensure it authorizes correctly with your data source.
Learn more about agent deployment in Kubernetes and Docker.
Check the agent connection
To verify that the agent has successfully connected to Nobl9, check for a valid timestamp in the Last Connection field on the Nobl9 Web.
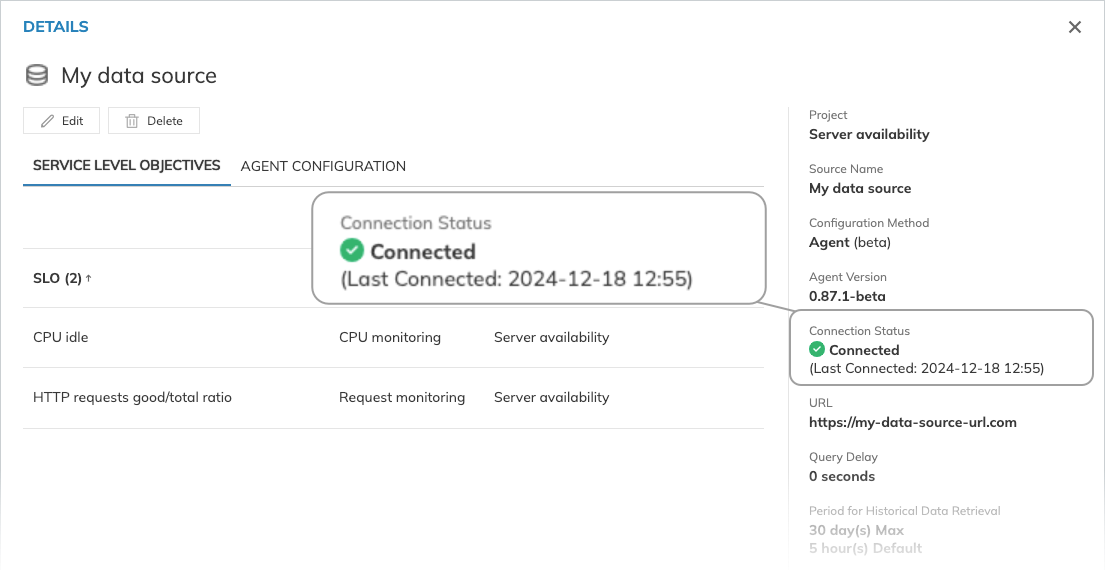
The Connected status indicates the agent's connection to the Nobl9 backend. To check its operation, you can use agent metrics
You have now successfully deployed your Nobl9 agent. With your agent live, you’re ready to create your first SLO and begin leveraging continuous monitoring and observability for enhanced service reliability