Helm charts
Manage your Nobl9 agent with Helm charts
Nobl9 provides a collection of Helm charts you can use to manage Nobl9 agents to retrieve SLI metrics from configured data sources and send the data back to Nobl9. The Helm charts are available on GitHub.
What is Helm?
Helm is the package manager for Kubernetes.
With Helm, you can define, install, and upgrade Kubernetes applications.
Read more about Helm.
Helm chart configuration
To set up a chart, do the following:
-
Install Helm and set up a connection to the desired Kubernetes cluster.
-
Add the Nobl9 repository:
helm repo add nobl9 https://nobl9.github.io/helm-chartsIt also returns the list of available charts. For example,
helm search repo Nobl9
NAME                    CHART VERSION   APP VERSION     DESCRIPTION
nobl9/nobl9-agent 1.0.0 0.48.0 Agent to retrieve SLI metrics from configured d... -
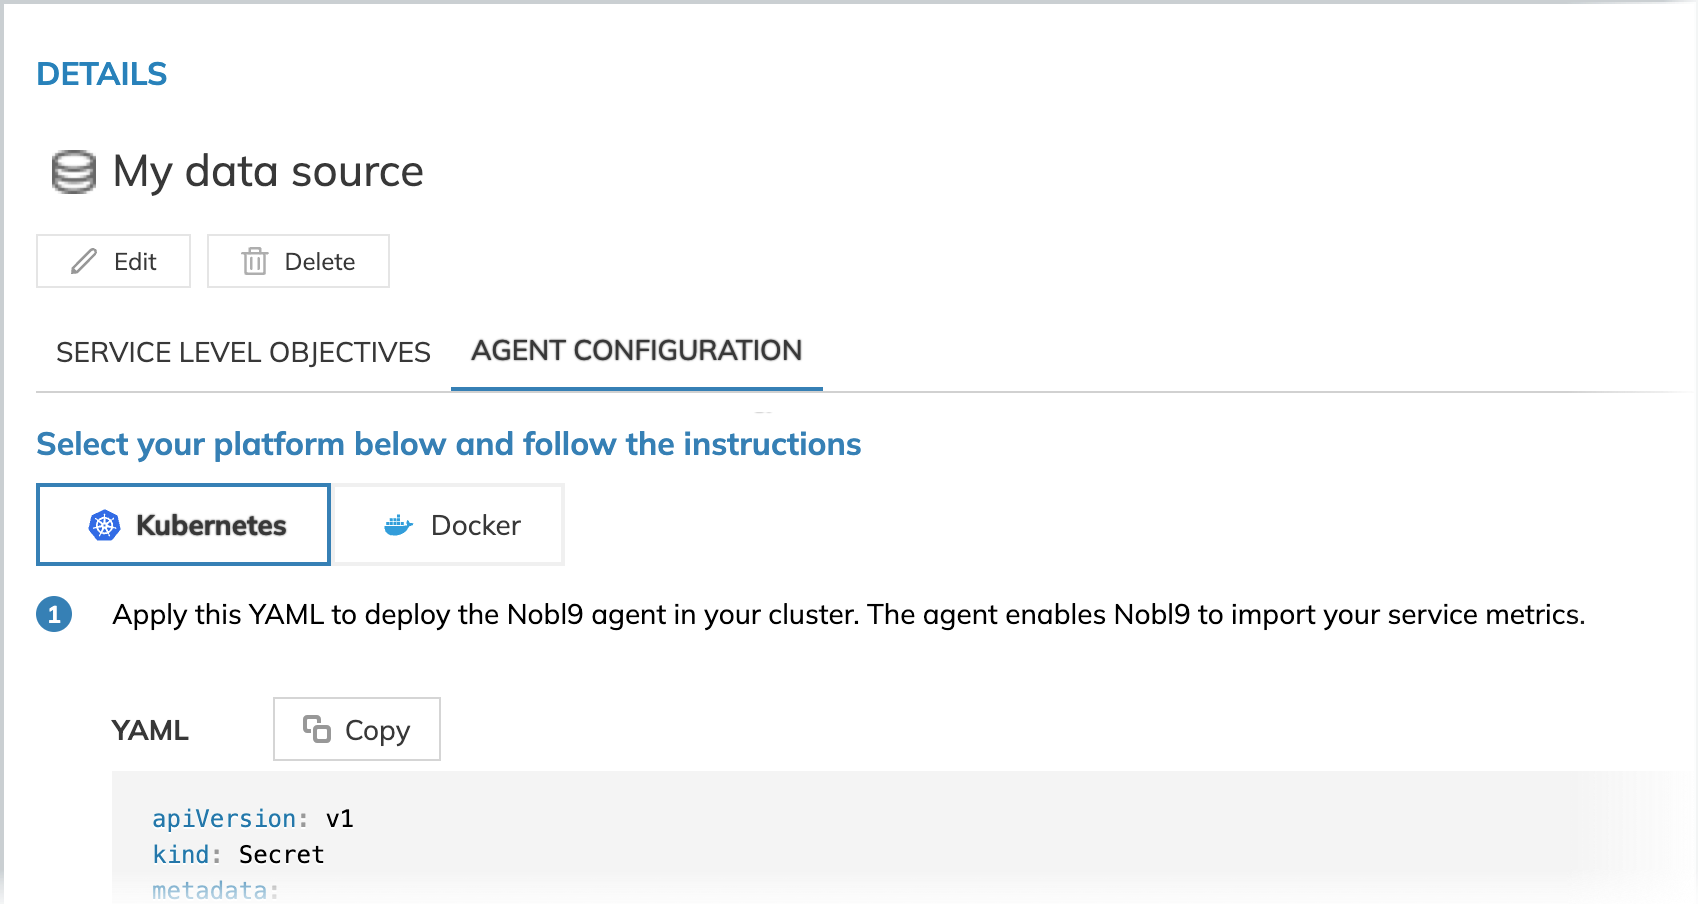
Get the agent variables under Sources on the Nobl9 Web.
- Open the Nobl9 app.
- Go to Integrations > Sources.
- Click the required data source.
The data source must be created with the Agent connection method. - Find the variable under the Agent Configuration > Kubernetes tab.

Image 1: Nobl9 agent configuration page example Read more about agent creation or adding a data source in the UI.
-
Prepare the chart values.
Review the required and default values.You can extend
values.yamlwith custom variables. For this, list the required variables under theextraEnvsobject:config:
clientId: my-id
clientSecret: my-secret
deployment:
version: 0.107.2
extraEnvs:
- name: N9_METRICS_PORT
value: "9090"
- name: N9_METRIC_BUFFER_LIMIT
value: "300000"
- name: N9_DIAGNOSTIC_QUERY_LOG_SAMPLE_INTERVAL_MINUTES
value: "0"- Important notes:
- ✓
clientIdandclientSecretcorrespond to theN9_CLIENT_IDandN9_CLIENT_SECRETvariables you see under the Agent Configuration tab.- ✓ The OpenTSDB data source requires an additional
N9_METRICS_PORTvariable.N9_OKTA_ORG_URLandN9_AUTH_SERVERcan be omitted since they are identical to the defaults described in values.yaml.
| Variable | Description |
|---|---|
N9_METRIC_BUFFER_LIMIT | Sets the agent buffer size for unsent datapoints. Approximately, 100k points fit in 100MB of runtime memory |
N9_DIAGNOSTIC_QUERY_LOG_SAMPLE_INTERVAL_MINUTES | Sets the frequency of logs emissions by the Nobl9 agent. To deactivate log emission, set the value to 0 |
-
Deploy the chart. For this, run:
helm install --values values.yml --generate-name nobl9/nobl9-agentThe expected output looks like this:
NAME: nobl9-agent-1663143197
LAST DEPLOYED: Wed Sep 14 10:13:20 2022
NAMESPACE: default
STATUS: deployed
REVISION: 1
TEST SUITE: None
Helm chart use cases
Here are some ways you can customize your Helm chart with:
Use existing Kubernetes secrets
When you already have a Kubernetes secret, for example, one synced with AWS Secrets Manager, you can adjust the chart instead of creating a new one.
As such, instead of providing secrets inline:
config:
clientId: my-id
clientSecret: my-secret
use the extraEnvs variable. For example,
deployment:
  extraEnvs:
    - name: N9_CLIENT_ID
      valueFrom:
        secretKeyRef:
          key: my-existing-secret-key
          name: my-existing-secret
    - name: N9_CLIENT_SECRET
      valueFrom:
        secretKeyRef:
          key: my-existing-secret-key
          name: my-existing-secret
Override the namespace or secret name
Charts are installed in the default namespace. The secret name corresponds to the chart name. You can use overrides to change this, for example:
namespaceOverride: my-custom-namespace
secret:
    nameOverride: my-custom-secret-name
Add extra data to a secret
Some data sources (for example, Splunk) require additional variables such as tokens or passwords. To store them securely, Kubernetes secrets are used. In the Helm chart, you can define the variables you want to be included in the secret. For example,
secret:
  extraData:
    SPLUNK_APP_TOKEN: my-app-token
deployment:
  extraEnvs:
    - name: SPLUNK_APP_TOKEN
      valueFrom:
        secretKeyRef:
          key: SPLUNK_APP_TOKEN
          name: <secret name (defaults to chart name)>
Add extra labels and annotations
To set custom annotations and labels:
config:
  project: my-project
  organization: my-org
  datasourceName: datadog
deployment:
  annotations:
    my-custom-annotation: value
extraLabels:
  my-extra-label: custom-value
The specified variables will be appended to the existing labels, annotations, and selector lists, for example:
labels:
  helm.sh/chart: nobl9-agent-1.0.0
  app.kubernetes.io/name: nobl9-agent
  app.kubernetes.io/instance: release-name
  nobl9.com/agent-datasource-name: datadog
  nobl9.com/agent-project: my-project
  nobl9.com/agent-organization: my-org
  app.kubernetes.io/version: "0.48.0"
  app.kubernetes.io/managed-by: Helm
  my-extra-label: custom-value
You can find more combinations in values.yaml.
Use custom arguments
The Nobl9 agent image has no ENTRYPOINT defined, so when passing custom args, the command must be set to run the telegraf executable.
command:
  - telegraf
args:
  - --debug