ServiceNow alert method
Using this method, Nobl9 automatically creates a ServiceNow event whenever your SLO reporting meets the conditions defined in your alert policy. If the generated event qualifies for a ServiceNow alert, the notification is sent.
Prerequisites
The ServiceNow alert method integration with Nobl9 requires the following prerequisites:
-
Authentication details. Your ServiceNow alert method must be linked to a ServiceNow instance. Nobl9 connects to your target instance and creates events there. To find your required instance name, check its
<instanceURL>/stats.dopage. You can authenticate to your target instance using one of the two authentication methods:- Basic authentication requires your ServiceNow user account credentials.
- Token-based authentication requires a ServiceNow REST API key token.
-
A dedicated Access Control List.
To integrate ServiceNow with Nobl9, set up an Access Control List (ACL) for your ServiceNow users.Required permissionsTo create a new ACL, you must have the
security_adminpermission assigned.Configure the new ACL with the following values:
- Type: record
- Operation: create
- Name: Event [em_event]
- Requires role: Assign new/existing role
After submitting your new ACL, assign the following roles to the users who must have access to the ServiceNow integration with Nobl9:
api_event_create- at least
evt_mgmt_integrationlevel role
For more details on ACLs, see ServiceNow documentation.
Adding the ServiceNow alert method
Alternatively, utilize the SLOs-as-code approach by:
- Applying an alert method YAML configuration with the
sloctl applycommand. - Configuring the ServiceNow alert method definition programmatically using the Nobl9 Terraform provider.
Nobl9 Web
- Navigate to Integrations > Alert methods.
- Click
 .
. - Select ServiceNow.
- Select the authentication method: Basic (default) or Token.
- Depending on the selected method, enter your ServiceNow account credentials or the REST API token (mandatory).
Changing the authentication method replaces the values in the Username and Password or ServiceNow REST API token fields with masked placeholders. If you want to save the changes, re-enter the original credentials or token, or provide the values for the newly selected authentication method.
- Enter your target Instance name (mandatory).
For more information, refer to the Authentication section.
- Select a Project (mandatory).
Projects provide the structure for organizing Nobl9 resources and managing access permissions.
If a project is not specified, Nobl9 assigns the default project value automatically. - Enter a Display Name (optional).
Spaces are allowed. - Enter a Name (mandatory).
It can only contain lowercase, alphanumeric characters, and dashes (for example,my-alert-method-1). Nobl9 auto-populates this field based on the display name you enter, transforming it into the supported format. You can edit the result. - Enter a Description (optional).
Provide extra details, such as the purpose and responsible personnel.
Up to 1050 characters.
-
Configure Alert resolution (optional) to receive a closing event after the Cooldown period is over.
The optional message will be sent in the closing event notification. - Click Add alert method
ServiceNow event severity mapping
ServiceNow returns event severity levels. To maintain consistency in handling alerts, Nobl9 maps these event severity levels to Nobl9 alert severity. Below is the mapping between Nobl9 and ServiceNow severities:
| ServiceNow | Nobl9 |
|---|---|
| Warning | Low |
| Minor | Medium |
| Major | High |
Event field properties populated in ServiceNow events
In ServiceNow events generated by Nobl9, the event fields are populated as follows:
| Name | Populated Value |
|---|---|
em_event.source | [Source]: Nobl9 |
em_event.node | [Node]: Service display name and/or name |
em_event.type | [Type]: Alert or Test (in case of test notification) |
em_event.resource | [Resource]: SLO display name and/or name |
em_event.resolution_state | [Resolution state]: New |
em_event.state | [State]: Ready |
em_event.description | [Description]: • SLO display name and/or name • Alert policy display name and/or name • Objective display name and/or name • Project display name and/or name • Organization name • Service display name and/or name |
em_event.additional_info | [Additional Information]: • Service name • SLO name • SLO details link • Alert policy conditions • Labels for SLO, service, alert policy, project (if defined) |
metric_name | [Metric Name]: Alert ID |
em_event.severity | [Severity]: Alert policy severity |
YAML configuration
- General YAML
- Working YAML: basic auth
- Working YAML: token-based auth
apiVersion: n9/v1alpha
kind: AlertMethod
metadata:
  name: servicenow-notification # Mandatory
  displayName: string # Optional
  project: default # Mandatory
  # Optional
  # The key value: only alphanumeric characters, `-`, `_`, or `.` are allowed.
  # The key value must start and end with an alphanumeric character.
  # An optional DNS subdomain prefix followed by `/` is allowed.
  annotations:
    key: value
spec:
  description: string # Optional
  servicenow:
    # Provide exactly one authentication method: either basic (username/password) or token-based (apiToken).
    # Basic authentication (default example; use these fields for basic auth):
    username: string # Required for basic authentication
    password: string # Required with username, secret
    # Token-based authentication (alternative to basic auth; use this instead of username/password):
    # apiToken: string # Required for token-based authentication, secret
    instanceName: string # Mandatory
    sendResolution:
      message: string
apiVersion: n9/v1alpha
kind: AlertMethod
metadata:
  name: servicenow
  displayName: ServiceNow method with basic auth
  project: default
  annotations:
    area: latency
    env: prod
    region: us
    team: sales
spec:
  description: Sends HTTP request to ServiceNow using basic authentication
  servicenow:
    username: Sam
    password: secret
    instanceName: servicenow-instance-name
    sendResolution:
      message: Alert is now resolved
apiVersion: n9/v1alpha
kind: AlertMethod
metadata:
  name: servicenow
  displayName: ServiceNow method with token auth
  project: default
  annotations:
    area: latency
    env: prod
    region: us
    team: sales
spec:
  description: Sends HTTP request to ServiceNow using API token authentication
  servicenow:
    apiToken: servicenow-rest-api-token
    instanceName: servicenow-instance-name
    sendResolution:
      message: Alert is now resolved
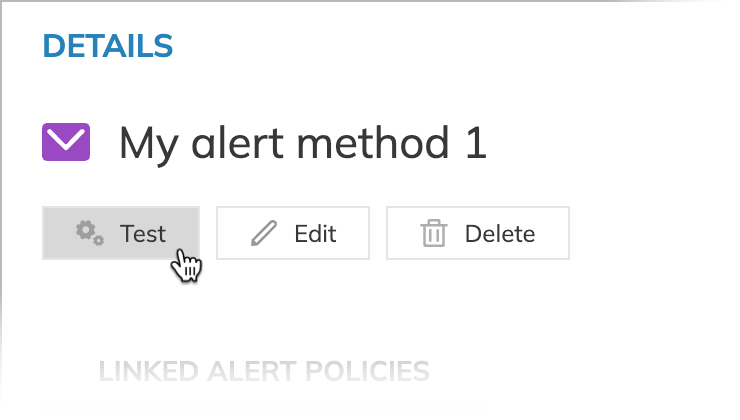
Testing alert methods
- Navigate to Integrations > Alert methods.
- Click the required alert method.
Its Details page opens. - Click Test under the alert method name:
- When the configuration is correct, Nobl9 displays Test completed successfully! under the button.
- Otherwise, the Test failed message appears. It contains the details of incorrect settings.

